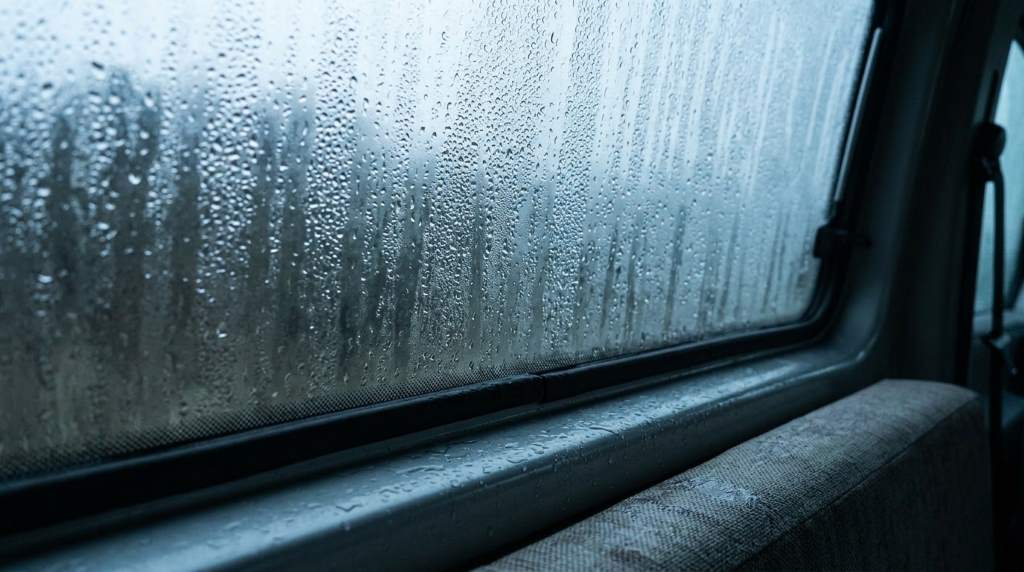
Van condensation can ruin a Seattle trip by soaking bedding, fogging windows, and creating persistent dampness. The best fix combines ventilation, controlled heat, dry storage, and daily moisture checks. Seattle receives about 37.82 inches of annual precipitation and records roughly 163 days with measurable rainfall. For trip planning, even the best outlander campervans reviewed need sensible moisture control when traveling through wet conditions.
Why Seattle Weather Makes Van Condensation Worse
Seattle creates ideal conditions for condensation because cool outdoor air often meets warmer air inside your van. When warm, moisture filled interior air touches cold glass or metal, water vapor turns into liquid droplets. NOAA climate normals show substantial precipitation throughout much of Seattle’s year, especially during autumn and winter.
Rain also encourages travelers to keep doors and windows closed for longer periods. Consequently, cooking, showering, breathing, and drying clothes can quickly raise interior moisture levels. The problem becomes worse when wet gear remains inside overnight.
Drivers can also underestimate how much moisture people produce while sleeping. Several occupants release moisture through normal breathing, while damp clothing adds even more water vapor. Therefore, condensation can appear even when the van looks completely dry before bedtime.
For additional trip preparation, reviewing drivers diagnose engine warning lights can help you understand dashboard alerts before longer journeys. Mechanical readiness matters because moisture problems become more stressful when vehicle issues appear simultaneously.
Where Condensation Usually Appears
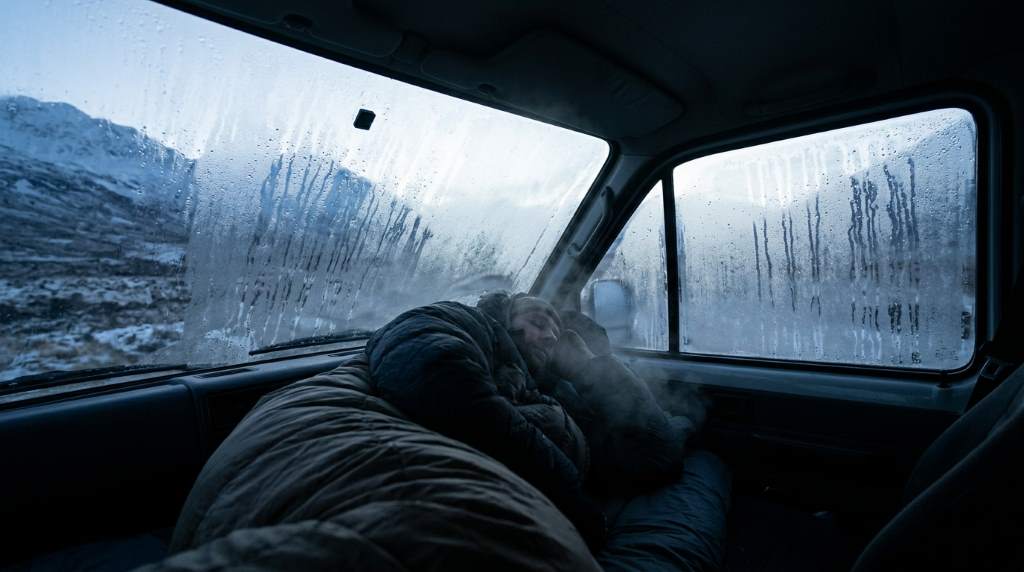
Condensation rarely spreads evenly across the entire interior. Instead, it usually collects around cold surfaces where warm interior air loses heat quickly. Windows, metal panels, roof areas, and poorly insulated corners often show moisture first.
Watch these locations carefully:
- Windows: Water gathers around glass because glass quickly reflects outdoor temperature changes.
- Roof panels: Moisture can collect above sleeping areas during cold nights.
- Rear doors: Metal surfaces often become cold enough to attract significant condensation.
- Mattresses: Moisture can hide underneath bedding where airflow remains limited.
- Storage compartments: Closed spaces can trap damp air around clothing and equipment.
How Van Condensation Damages Your Trip
Condensation creates more than an annoying layer of water on windows. Over time, repeated moisture can affect comfort, equipment, fabrics, insulation, and interior materials. The longer moisture remains inside, the greater the chance of secondary problems.
First, wet windows can reduce visibility during morning departures. That creates an unnecessary safety issue when you need clear sight lines before driving. Furthermore, wiping glass repeatedly becomes frustrating when condensation returns minutes later.
Second, damp bedding can make sleeping uncomfortable and leave fabrics smelling musty. Moist mattresses also dry slowly when rainy weather prevents outdoor airing. Therefore, one wet night can affect comfort for several following nights.
Third, persistent moisture can encourage mold growth when suitable conditions continue. Mold concerns become particularly relevant around fabrics, cushions, carpets, and hidden storage spaces. Early moisture control remains much easier than dealing with established growth later.
Moisture Can Damage Van Equipment
Water vapor can also affect equipment when condensation repeatedly forms around sensitive areas. Electronics, connectors, tools, cameras, and other gear benefit from a dry storage environment. Consequently, condensation management protects both your comfort and your travel equipment.
Electrical concerns deserve extra attention when water reaches connectors or exposed wiring. Moisture does not automatically create an electrical failure, but repeated exposure can contribute to corrosion. Therefore, keep sensitive equipment away from areas where droplets regularly form.
Before leaving each morning, inspect visible moisture around electrical components and storage areas. Dry affected surfaces and improve airflow before continuing your journey. Small daily checks can prevent larger problems during a multi day trip.
You can also review reset dashboard warning lights procedures when vehicle alerts appear after wet conditions. However, never reset an important warning without understanding why the warning appeared.
How Sleeping Inside a Van Increases Moisture
Sleeping inside a closed van creates a natural moisture buildup cycle. Your breathing releases water vapor throughout the night, while warm bedding raises the interior temperature. When that warm air touches cold windows, condensation forms quickly.
Two travelers can produce noticeably more interior moisture than one traveler. Pets can add moisture too, especially when they enter the van after wet outdoor walks. Therefore, ventilation becomes more important as the number of occupants increases.
Many travelers close every vent because Seattle nights feel cold and damp. Unfortunately, that strategy traps moisture inside the living area. A small amount of controlled ventilation often works better than completely sealing the van.
Why Wet Gear Creates Another Problem
Seattle travel often involves rain jackets, shoes, towels, and other damp items. Storing these items inside the van releases their moisture into the surrounding air. As a result, condensation can continue increasing even after rainfall stops.
Create one dedicated area for wet equipment whenever possible. Keep wet shoes on a washable tray and hang rain gear where air can circulate. Avoid placing damp clothing directly beside bedding or closed storage.
Dry towels promptly instead of leaving them bundled on seats. Spread wet fabrics apart so air reaches both sides of each item. Additionally, remove unnecessary packaging that traps moisture around damp equipment.
How to Stop Condensation From Ruining Seattle Trips
The most effective strategy combines ventilation, temperature control, moisture removal, and simple daily habits. No single product can replace good airflow inside a compact campervan. Instead, use several small controls together for better results.
Planning your driving days also helps reduce rushed decisions during wet conditions. Resources covering all van routes you need can support better route preparation before heading into changing weather. A flexible itinerary gives you more time to dry the interior properly.
1. Keep Air Moving
Ventilation provides the most direct way to remove moisture from the interior. Open a roof vent or window slightly when conditions allow safe airflow. Use an exhaust fan when cooking or showering to move humid air outside.
Do not rely only on opening the main door after condensation appears. Instead, create a continuous airflow path whenever practical. Fresh air entering through one opening should move toward an exhaust point.
During heavy rain, use controlled ventilation rather than leaving large openings exposed. A small vent opening can still exchange air without allowing excessive rain inside. Check your vent design before relying on it during storms.
2. Control Interior Heat
Heating the van can improve comfort, but excessive temperature differences can still encourage condensation. Warm humid air touching cold surfaces creates the conditions condensation needs. Therefore, combine heating with ventilation instead of using heat alone.
Keep the interior comfortably warm rather than extremely hot. Maintain steady airflow while heating the sleeping area. This approach helps reduce moisture concentration near cold windows and walls.
3. Use a Moisture Absorber
Moisture absorbing products can help control small amounts of leftover humidity. Place them near storage areas, sleeping spaces, and other locations where air circulation remains limited. However, they should support ventilation rather than replace it.
Check absorbers regularly and replace them according to their product instructions. A saturated absorber cannot continue removing meaningful amounts of moisture. Keep replacement supplies available during longer trips.
4. Dry Wet Items Quickly
Wet clothing should never remain piled inside a closed van overnight. Hang rain gear near an airflow path and separate damp fabrics whenever possible. Likewise, remove wet shoes from enclosed storage compartments.
If weather permits, dry equipment outside during daylight hours. Even limited outdoor drying can remove significant moisture from fabrics. Bring everything inside only after the items become reasonably dry.
5. Protect the Mattress
The mattress deserves special attention because moisture can collect underneath it without obvious warning. Poor airflow beneath bedding creates a hidden damp zone. Over time, that environment can damage fabric and create unpleasant odors.
Lift the mattress regularly and inspect the surface beneath it. Allow air to circulate underneath whenever your van design permits. Consider a breathable mattress support system if condensation repeatedly appears below the bedding.
6. Wipe Moisture Every Morning
A quick morning inspection can prevent small condensation problems from becoming larger ones. Wipe visible droplets from windows, doors, walls, and other cold surfaces. Then identify why moisture accumulated during the night.
Do not simply wipe the water and ignore the cause. Ask whether cooking, sleeping, wet clothing, or poor airflow created the excess moisture. Fixing the source makes the next morning easier.
A Simple Seattle Van Condensation Routine
A consistent routine works better than occasional deep cleaning. Build moisture checks into your normal morning and evening travel habits. This approach takes only a few minutes but can protect your interior throughout the trip.
Morning routine:
- Wipe condensation from windows and cold surfaces.
- Lift bedding and check underneath the mattress.
- Open vents briefly to exchange humid interior air.
- Hang damp towels and clothing where airflow reaches them.
- Inspect storage areas for hidden moisture.
Evening routine:
- Dry wet clothing before preparing your sleeping area.
- Remove wet shoes from enclosed storage spaces.
- Run ventilation while cooking or preparing hot drinks.
- Maintain comfortable heat without completely sealing the van.
- Keep a moisture absorber active in suitable storage areas.
This simple system also helps you notice problems before they become expensive. For example, recurring moisture near one wall could indicate poor insulation or a water leak. Treat unusual moisture patterns as clues rather than normal Seattle weather.
Condensation Versus a Water Leak
Not every water problem inside a van comes from condensation. A leak can produce similar symptoms, but it usually creates moisture in a specific location. Condensation often appears across multiple cold surfaces at the same time.
Look for these clues:
- Condensation: Moisture appears broadly on windows and other cold surfaces.
- Roof leak: Water concentrates near a roof seam or overhead fitting.
- Door leak: Moisture collects around seals or lower door edges.
- Plumbing leak: Water appears near tanks, pipes, or plumbing connections.
- Hidden dampness: One isolated area stays wet despite improved ventilation.
If one area remains wet after several dry days, investigate the source carefully. Persistent localized moisture can indicate a seal, plumbing, or bodywork problem. Fixing that issue matters more than adding another moisture absorber.
What Seattle Travelers Should Pack
A compact moisture control kit can make rainy van trips much easier. You do not need a large collection of specialized equipment. Focus on practical items that support drying, airflow, and inspection.
Consider packing:
- Microfiber cloths for wiping windows and hard surfaces.
- A small moisture absorber for enclosed areas.
- Ventilation accessories that fit your van safely.
- A washable tray for wet shoes and gear.
- Quick drying towels for daily cleanup.
- A small flashlight for inspecting hidden damp areas.
- Breathable storage bags for damp clothing.
Pack these items where you can reach them quickly. Moisture control becomes harder when basic supplies remain buried beneath luggage. Easy access encourages consistent use during rainy travel.
When Condensation Means You Should Stop and Investigate
Heavy condensation deserves attention, especially when it returns immediately after cleaning. Repeated moisture can signal inadequate ventilation, excessive indoor humidity, or a hidden leak. Do not assume every persistent problem comes from Seattle’s weather.
Investigate further when you notice musty odors, wet insulation, stained panels, or recurring moisture in one location. Check roof seams, door seals, windows, plumbing areas, and storage compartments. If you cannot identify the source, have a qualified professional inspect the vehicle.
Also pay attention to moisture that appears during otherwise dry weather. That pattern can indicate an internal source rather than outdoor humidity. Early investigation can protect your trip and reduce repair costs later.
Why Moisture Control Improves the Whole Trip
Good condensation control does more than keep windows clear. It improves sleeping comfort, protects gear, reduces unpleasant odors, and keeps the living area easier to maintain. Most importantly, it lets you enjoy rainy Seattle weather without constantly fighting dampness.
A dry interior also makes morning departures faster. You spend less time wiping glass, drying bedding, and searching for damp equipment. Consequently, you can start exploring sooner and spend more time enjoying your route.
Seattle’s wet climate does not have to ruin a campervan adventure. Use steady ventilation, controlled heating, dry gear storage, and daily inspections. These habits provide a practical defense against condensation throughout your journey.
Conclusion
Van condensation ruins Seattle trips when moisture builds faster than the interior can remove it. Rainy conditions, sleeping occupants, wet gear, cooking, and poor airflow can quickly create persistent dampness. The solution starts with ventilation, then adds drying habits, moisture control, and regular inspections.
Before your next Seattle campervan trip, prepare a simple moisture routine and test your ventilation system. Check bedding each morning and investigate any unusual dampness immediately. Take control of interior moisture before it controls your comfort, equipment, and travel plans.
Ready for a more comfortable rainy trip? Prepare your van before departure, pack moisture control essentials, and make daily ventilation part of your travel routine.
Frequently Asked Questions
Why does my van get condensation overnight?
Sleeping occupants release moisture that condenses when warm interior air meets cold windows and metal surfaces.
Does heating a van prevent condensation?
Heating improves comfort but works best when you combine it with steady ventilation and moisture removal.
Should I open my van windows in Seattle rain?
A small controlled opening or roof vent can improve airflow when weather and security conditions allow.
Can condensation damage a campervan?
Yes, repeated moisture can contribute to damp fabrics, odors, corrosion, mold growth, and interior material damage.
How can I reduce condensation while sleeping?
Use controlled ventilation, avoid drying wet gear inside, and maintain steady comfortable interior temperatures.