Thermostat Replacement Car: A Step-by-Step Guide to Replacing Your Car’s Thermostat
Maintaining your vehicle’s cooling system is crucial for engine performance and longevity. A key component in this system is the thermostat, a small but vital device that regulates engine temperature by controlling coolant flow. When a thermostat fails, it can lead to overheating, poor fuel efficiency, or inadequate cabin heating. Replacing a car thermostat is a manageable task for DIY enthusiasts and can save you time and money compared to a mechanic visit. This comprehensive guide will walk you through the signs of a failing thermostat, tools needed, and a step-by-step process for thermostat replacement in your car, ensuring your vehicle runs smoothly in 2025 and beyond.
Why Your Car’s Thermostat Matters
The thermostat in your car acts like a gatekeeper for the coolant, opening and closing to maintain an optimal engine temperature. Typically, it stays closed when the engine is cold, allowing it to warm up quickly. Once the engine reaches the right temperature (usually around 195°F to 220°F, depending on the vehicle), the thermostat opens to let coolant circulate through the radiator, preventing overheating. A faulty thermostat can get stuck open, causing the engine to run too cool and reducing efficiency, or stuck closed, leading to overheating and potential engine damage. Recognizing the need for a thermostat replacement in your car is the first step to keeping your vehicle reliable.
Signs You Need a Thermostat Replacement
Before diving into the replacement process, it’s essential to identify whether your car’s thermostat is failing. Here are common symptoms to watch for:
- Overheating Engine: If your temperature gauge spikes into the red zone or you see steam from the hood, the thermostat may be stuck closed, blocking coolant flow.
- No Heat in the Cabin: A thermostat stuck open can prevent the engine from warming up enough to produce heat for the heater core.
- Erratic Temperature Readings: Fluctuating gauge readings may indicate a thermostat that’s inconsistently opening or closing.
- Poor Fuel Economy: An engine running too cool burns more fuel due to inefficient combustion.
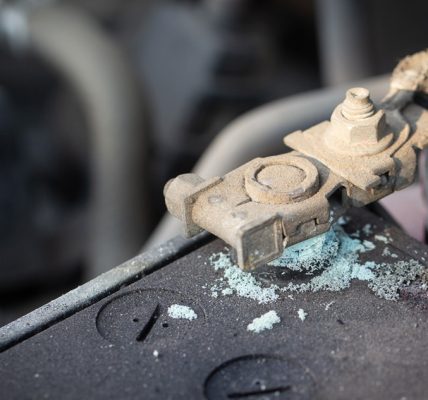
- Coolant Leaks: Leaks near the thermostat housing could signal a gasket failure or corrosion, often tied to thermostat issues.
If you notice these signs, it’s time to consider a thermostat replacement for your car. Acting quickly can prevent costly repairs like a blown head gasket or warped engine components.
Tools and Materials Needed for Thermostat Replacement
Preparation is key to a smooth thermostat replacement. Gather these tools and materials before starting:
- New Thermostat: Ensure it matches your car’s make, model, and year. Check your owner’s manual or consult an auto parts store.
- Thermostat Gasket: Often included with the thermostat; if not, purchase one separately.
- Wrench Set: Typically, 8mm, 10mm, or 13mm wrenches for bolts on the thermostat housing.
- Screwdriver: Flathead or Phillips, depending on your car’s hose clamps.
- Pliers: For removing hose clamps.
- Coolant: Fresh antifreeze/coolant (50/50 mix with water) to refill the system.
- Drain Pan: To catch old coolant during drainage.
- Rags and Gloves: For cleanup and hand protection.
- Socket Set: For stubborn bolts or tight spaces.
- Scraper or Wire Brush: To clean the thermostat housing surface.
- Jack and Jack Stands: If the thermostat is under the car, you’ll need to lift it safely.
Safety tip: Always let the engine cool completely before starting work to avoid burns from hot coolant or components.
Step-by-Step Guide to Replacing Your Car’s Thermostat

Follow these steps to replace your car’s thermostat efficiently and safely. Note: Exact steps may vary slightly depending on your vehicle’s make and model, so consult your owner’s manual for specifics.
Step 1: Prepare Your Vehicle
Park your car on a flat surface, engage the parking brake, and ensure the engine is cool. Disconnect the negative battery cable to prevent electrical issues during the repair. If the thermostat is located under the car, use a jack to lift the vehicle and secure it with jack stands.
Step 2: Drain the Coolant
Locate the radiator drain plug (usually at the bottom of the radiator) and place a drain pan underneath. Slowly open the plug to drain the coolant. You don’t need to empty the entire system—drain just enough to lower the coolant level below the thermostat housing. Close the plug once done.
Step 3: Locate the Thermostat
The thermostat is typically housed where the upper radiator hose connects to the engine. Trace the hose from the radiator to the engine block or intake manifold to find the thermostat housing, usually secured with two or three bolts.
Step 4: Remove the Thermostat Housing
Use a wrench or socket to loosen the bolts holding the thermostat housing. Carefully remove the housing, noting any attached hoses or clamps. You may need pliers or a screwdriver to loosen hose clamps. Gently pry the housing off, as it may be stuck due to the old gasket. Watch for residual coolant spillage—keep rags handy.
Step 5: Remove the Old Thermostat
Once the housing is off, you’ll see the thermostat. Note its orientation (e.g., which side faces up, often marked with an arrow or “top”). Gently lift it out. Use a scraper or wire brush to clean the housing and engine mating surfaces, removing old gasket material, rust, or debris for a clean seal.
Step 6: Install the New Thermostat
Place the new thermostat in the same position as the old one, ensuring proper alignment. Check that the temperature rating (e.g., 195°F) matches your vehicle’s specs. Position the new gasket (some are self-adhesive or require sealant—follow the product instructions) between the thermostat and housing.
Step 7: Reassemble the Housing
Reattach the thermostat housing to the engine, tightening the bolts snugly but not excessively to avoid cracking the housing. Reconnect any hoses and secure them with clamps. Double-check all connections for a tight fit.
Step 8: Refill the Coolant
Open the radiator cap and pour in the 50/50 coolant mix until it reaches the “full” line. If your car has a separate coolant reservoir, fill that as well. Leave the cap off for now to bleed air from the system.
Step 9: Test the System
Reconnect the battery cable. Start the engine and let it idle, watching the temperature gauge. As the engine warms, the thermostat should open, and you may see coolant circulate in the radiator (with the cap off). Check for leaks around the housing. Once the engine reaches operating temperature, turn on the heater to confirm warm air output. Top off coolant if needed, then replace the radiator cap.
Step 10: Clean Up and Dispose
Wipe down any spills with rags. Dispose of old coolant properly—many auto parts stores or service stations accept it for recycling. Test drive your car to ensure the temperature stays stable and no issues arise.
Tips for a Successful Thermostat Replacement
- Check Compatibility: Verify the thermostat’s temperature rating and fit for your car.
- Inspect Related Parts: While you’re in the system, check hoses, clamps, and the radiator for wear or leaks.
- Bleed the System: Run the engine with the radiator cap off to remove air bubbles, preventing overheating.
- Torque Properly: Tighten bolts to the manufacturer’s specs (check your manual) to avoid damage.
- When to Seek Help: If you encounter rusted bolts, severe leaks, or a complex setup, consider a professional mechanic.
Cost of Thermostat Replacement for a Car
A new thermostat typically costs $10 to $50, depending on the vehicle. Gaskets are $5 to $15, and coolant runs $10 to $20 per gallon. DIY replacement can keep costs under $50-$100, while professional labor might add $50 to $150, totaling $100 to $250. Doing it yourself saves money and builds confidence in car maintenance.
Read More Also: Easy Car Loan
Why Replace Your Car’s Thermostat in 2025?
As of June 08, 2025, vehicle maintenance remains critical with rising repair costs and advanced engine designs. A working thermostat ensures optimal fuel efficiency, reduces emissions, and protects your engine from extreme temperatures. This aligns with Google’s helpful content guidelines, offering practical, up-to-date advice for car owners seeking reliable DIY solutions.
Read More Also: Unique Classic Cars LLC
Conclusion
Replacing your car’s thermostat is a straightforward, cost-effective way to maintain engine health and performance. By recognizing failure signs, gathering the right tools, and following this step-by-step guide, you can tackle a thermostat replacement for your car with confidence. Regular maintenance keeps your vehicle running smoothly, saves fuel, and prevents major repairs. Drive safely, and enjoy the satisfaction of a job well done!